2.1. Creating a Map
In OpenLayers, a map is a collection of layers and various controls for dealing with user interaction. A map is generated with three basic ingredients: markup, style declarations, and initialization code.
2.1.1. Working Example
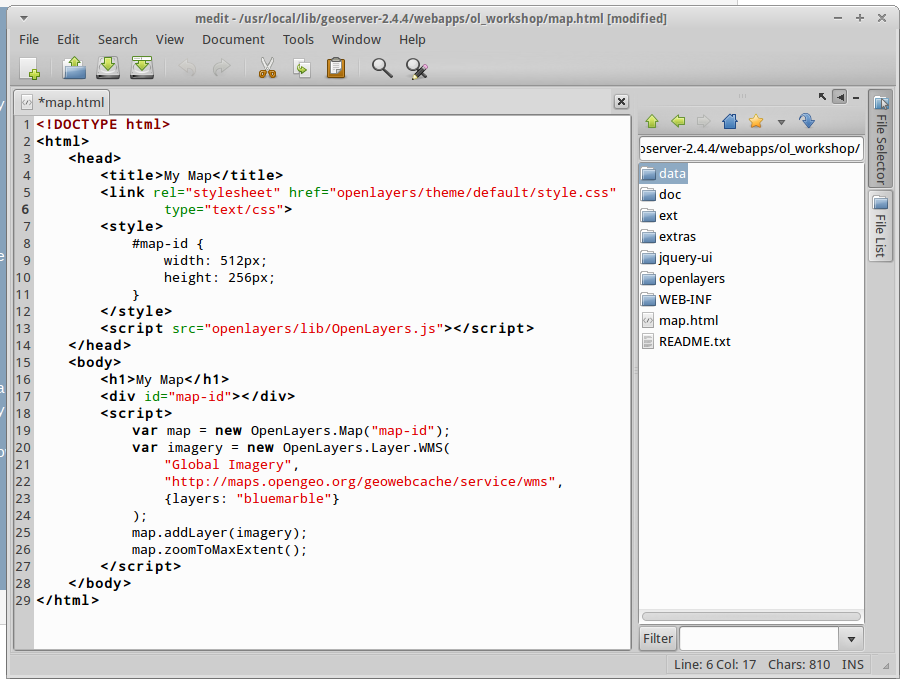
Let’s take a look at a fully working example of an OpenLayers map.
<!DOCTYPE html>
<html>
    <head>
        <title>My Map</title>
        <link rel="stylesheet" href="openlayers/theme/default/style.css" type="text/css">
        <style>
            #map-id {
                width: 512px;
                height: 256px;
            }
        </style>
        <script src="openlayers/lib/OpenLayers.js"></script>
    </head>
    <body>
        <h1>My Map</h1>
        <div id="map-id"></div>
        <script>
            var map = new OpenLayers.Map("map-id");
            var imagery = new OpenLayers.Layer.WMS(
                "Global Imagery",
                "http://maps.opengeo.org/geowebcache/service/wms",
                {layers: "bluemarble"}
            );
            map.addLayer(imagery);
            map.zoomToMaxExtent();
        </script>
    </body>
</html>
Tasks
- Copy the text above into a new file called
map.html, and save it in the root of the workshop folder. - Open the working map in your web browser: http://localhost:8082/ol_workshop/map.html
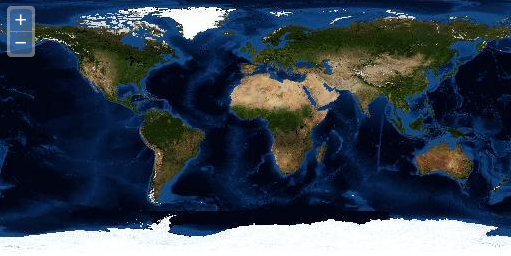
A working map of displaying imagery of the world.
Note
You can use medit () as your HTML editor for this workshop, it’s easy to use and has several nice features like syntax highlighting, line numbers, file explorer panel, etc.
Having successfully created our first map, we’ll continue by looking more closely at the parts.